
My pouf, my lovely new footrest. Don’t mind my plate rest – it’s just my baby belly getting into the frame.
I must confess: this is not my pouf pattern. I followed the Red Heart Pouf pattern found here. They do a great job explaining it and it works up really fast.
Now that I’ve got that off my chest, let’s dive in to why I have to post a tutorial. The pouf comes out to roughly 27″ in diameter. And I say roughly because mine is about 32″ in diameter, I used a larger needle than it called for and *gasp* I used a heavier weight yarn – only because *double gasp* the store didn’t have all the yarn I needed in the “grande” which is what the pattern calls for. The pattern also says to use a child’s small bean bag cover for the lining. This does not work. Trust me. I tried. Don’t do it if you want the pouf to resemble anything besides a bean bag. Crocheted pieces mold to whatever is underneath them – so if it’s round it will be round and a bean bag is round, not cylindrical like the pouf I was trying to make. And yes, of course I tried using a bean bag liner first that’s how I know.
This pouf tutorial is really about sewing a pouf lining for your crocheted pouf bag.
Step 1
Gather your supplies: your almost finished crocheted pouf bag, an old queen or king sheet, a zipper (optional) and your sewing machine.
Step 2
Take a string and cut it to be the same length as the radius of the top panel of your pouf plus 1/2″. Using the string as a guide, hold a pen and draw a nice circle that should somewhat resemble your top panel directly onto your sheet. Your non-dominant hand acts like the fulcrum of the circle as the string keeps your hand steady – drawing an almost perfect circle.

Fold the sheet and cut out two circles and set aside.

Step 3
Measure the height of your crocheted pouf. It should be around 15″ add an inch for seams and this will be the width of your panel lining. Next, multiply 2 x’s the length of the string x 3.14 (should look something like this: 14 x 2 x 3.14). This will get you the total length of the panel. It’s the circumference of your circle. If you aren’t feeling like geeking it out with math equations you can also just take your fabric tape measurer (is this even a word?) and measure around the outside of your circle cut outs from the sheet. Once you have this number – and don’t worry if it’s big it should be, that will be the length of your center panel. If your sheet is not long enough, use a scrap to piece it together like I did.

Can you see the small piece that is next to the longer piece? What is great about piecing two pieces together is you can choose to piece two sides of the sheet that have finished edges. So what you say? Guess how easy that makes it to throw a zipper in?!!! You literally just sew the zipper between the two pieces and tada they are joined and you don’t even have to go all postal on it.
Makes me feel like this when stuff like that works out:
Step 4 (optional)
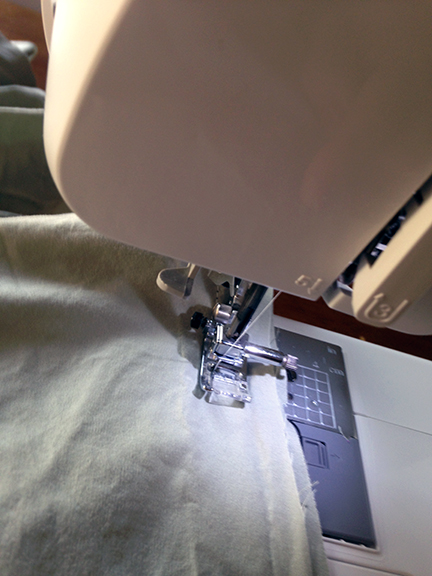
Sew in your zipper. Place your fabric and zipper wrong side up with the zipper centered over the two finished edges of sheet touching eachother underneath the teeth of your zipper. Tape everything down with some tape. Using your zipper foot, sew a straight line on either side of the zipper, then across both the top and bottom of the zipper. Open your zipper halfway.
I don’t have any pics of this but a great tutorial is here. Her tutorial goes in to what to do if your edges aren’t already finished. Honestly though, try to cut your sheet so that you get two finished pieces that can match up for the zipper.
Step 5: Match right sides together with wrong sides out and sew your rectangular panel to one of your circles, leaving about 1/2″ for your seam. Now, don’t get all stressed and worried that it’s not lining up or looks like crap, this is a liner. It doesn’t have to look perfect, it just needs to function. I didn’t pin anything together, I just kept holding it as I fed it through my machine.
Just in case though: the longer side of the rectangle matches up to the outer edges of the circles. When you’ve attached the two pieces together, grab your other circle and piece it to the other long side of the rectangle and sew it up.

Just sew right over your zipper when you get to it.

Step 6
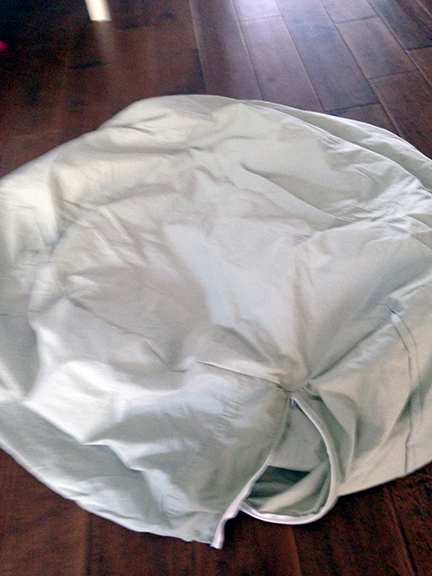
You should now have something that roughly resembles a cylinder. You will still have an opening where the rectangle ends butt together. Grab the two ends, right sides together and just sew a straight line right up the whole length of the gap – be sure to back stitch everything because your pouf is going to be jumped on/sat on/thrown etc…Then, using the opening you left in your zipper (remember when I said to open it halfway?) pull your fabric through so that it is right side out. If you did not put in a zipper, then do not sew this gap completely closed, leave yourself about 6-8″ and pull your fabric through that. This will also be the hole you use to stuff your bag.
Step 7
Fill it with your choice of stuffing. I’ve heard people use old shirts/blankets. I happened to have an old foam mattress that I have been slowly whittling down to nothing. I shredded up a 2’x4′ x 6″ section and stuffed my bag with that. Zip it closed. Now if you didn’t use a zipper you are going to have to negotiate your stuffed bag into your sewing machine or hand stitch your hole shut. Trust me on this: zipper’s are a whole lot easier.
Step 8
Join your crocheted piece together about halfway around the bottom panel – following the pattern. Then, place your stuffed bag into the pouf bag like this:
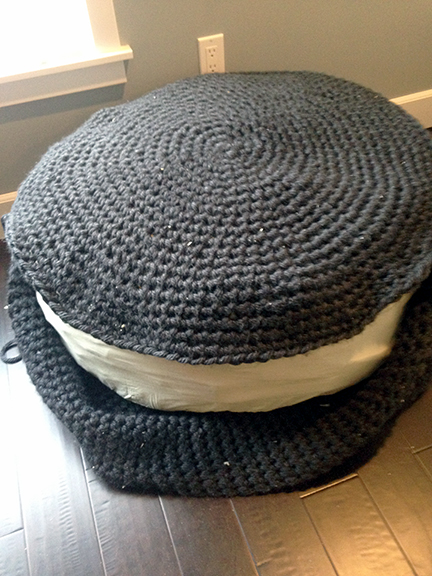
Once it’s all in crochet the slip stitch around the entire opening to join it all together.
Sit back and put your feet up. You deserve it.


Wow, good job.
You know, Uncle Donny taught me and Hilary how to crochet when we were maybe 7 and 8? We were so bored at Great Grandma’s house. Now the girls are learning to do it too. Makes me wonder how boring it must be here…lol
You are amazing